You may not know it, but your Windows has a registry that holds several important files and data about your computer system. However, it may also contain some broken items that eat up your memory and affect your system’s performance. Let’s look at some useful ways to remove broken registry items.
Table of Contents
What Are Broken Registry Items?
Broken registry items is a collective term used to denote all corrupted or deleted registry entities that remain in your PC after deleting something. They pile up over time and consume your phone’s memory. Hence, they can slow down your PC and also lead to performance issues. Hence, it’s important to remove them from your system.
Why Remove Broken Registry Items?
As discussed, broken registry items can cause performance issues in your PC. Since they are residue files, they are like junk. Since you’ll never actively use them, they are useless items acquiring a lot of space on your system. This has a few drawbacks:
- Your PC will always be out of space, and you won’t be able to figure out which files are eating up the space.
- Your PC will slow down substantially, interfering with your daily operations.
- Too many broken registry items can also lead to security risks in your PC.
How to Remove Broken Registry Items?
One thing is clear that you must get rid of broken registry items from your PC as soon as possible. The problem, however, is that they can be tricky to find and delete. These files are hidden deep inside the folders, and locating them is not easy. Thankfully, you don’t need to find and delete these files manually. Here are some effective methods to remove broken registry items from your PC.
Clean Up Your Disk
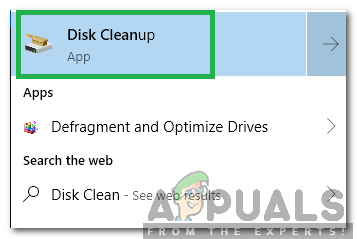
The first method is to clean up your PC disk. You can do it using the Disk Cleanup feature, which you’ll see in all Windows versions. To locate the feature, open the Windows search box by clicking on the search bar in the bottom left corner. You can also press Win + S to open the search box.

In the search box, search for “Disk Cleanup” and open the Disk Cleanup app. Now, choose the drive on which you’ve installed windows, select the files you want to delete, and then click on “Clean up system files,” followed by clicking Ok. The process will take some time, and all the unnecessary files from your computer will be deleted.
Run the DISM Tool to Remove Broken Registry Items
DISM stands for Deployment Image Servicing and Management, and it is used in a wide range of Windows errors, like BSoD. You can use DISM to remove registry items too.

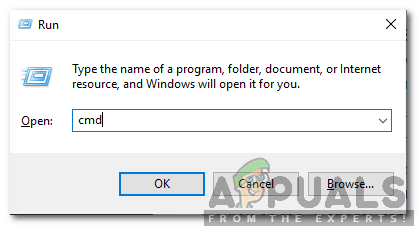
Open the Run box by pressing Win + R. In the search box, type cmd and then Shift + Ctrl + Enter to open the command prompt with administrative privileges. Contrarily, you can go to Windows Search, search for the Command Prompt, and run it as an administrator.
In the command prompt, execute the following command:
DISM /Online /Cleanup-Image /ScanHealth
Let the command prompt perform the process.
Reset Your PC
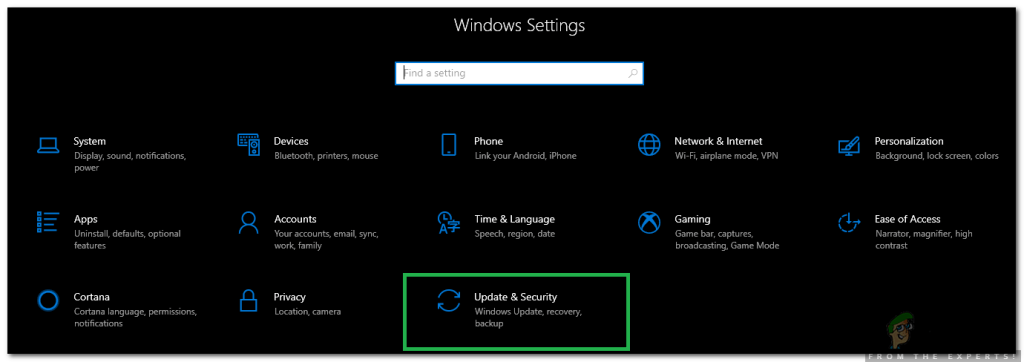
The next method is to reset your PC and reinstall Windows. You can do this by going to your Windows Settings and then to Update and Security. You can also search for “Update and Security” in Windows Search.

In Update and Security, go to Recovery and then find the option to Reset this PC. This option will reinstall Windows on your PC, thereby removing all registry items. You have the option to keep your files or completely format your system.
Use SFC to Scan for Broken Registry
System File Checker (SFC) is a helpful tool for checking and removing broken registry items from a Windows PC. It uses a “repair or replace” approach to scan your PC for corrupt files. If the tool finds problematic files, it replaces them with fresh and healthy files.
To access SFC, open the command prompt as an administrator using the process we discussed earlier. Execute the following command in the command prompt:
sfc /scannow
The system scan will start, and it can take a few minutes to complete. Once done, SFC will let you know if it has found or removed any files. If you get an error message, repeat the step from scratch or restart your computer.
Repair Your Windows to Remove Broken Registry Items
In an earlier step, we discussed that resetting your system and reinstalling Windows is an effective method to remove broken registry items. However, some users may not want to reinstall their entire system. In that case, you can use the repair install functionality.
Head to the Microsoft website and download the Windows disk image file. During the installation, you’ll get an option to select what to keep and what to remove. Install the repair Windows, and the broken registry items will be removed.
Run Automatic System Repair
The next step is to run automatic Windows repair. To do that, go to the Update and Security settings as discussed in the previous steps. In the Recovery section, head to Advanced Startup and click on Restart Now.
Your PC will reboot into the Startup Options menu where you’ll get options to restart Windows normally, Troubleshoot your PC, or turn it off. Click on Troubleshoot and then click on Advanced option. Finally, click on Startup repair. Enter your account password and continue.
Use a Registry Scanner and Removal Tool
If the steps mentioned above seem technical and difficult to execute, we have good news for you. You can easily scan and repair broken registry items using a registry scanner tool. Several registry scanners are available that automate the entire process. The best registry scanner tools are:
- Iolo System Mechanic
- Outbyte PC Repair
- Restoro
- CCleaner
- Defencebyte
Wrap Up: Remove Broken Registry Items
Broken registry items in your PC can eat up storage space, slow down your PC, and put your PC at risk. It’s important to remove these items, but finding them can be tricky. You can use the methods discussed above to remove broken registry items and ensure the optimum health and performance of your system.


